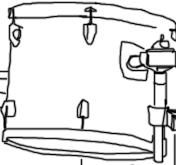
Drum Course Beginner Lesson 2
Overview"what this lesson is about"
How To Re-skin The Bass Drum
In this lesson we are going to have a close look on how to re-skin your bass drum. This is important if you want to keep your kit sounding as good as possible.
Watch The Video
Let's get started!
Step 1 -
As evenly as possible, loosen all of the lugs on the beater side of the bass drum. It is important that you do this working in opposites to ensure that no unnecessary stress is put onto the head of the drum.
Step 2 -
Remove the bass drum hoop and skin. Use this opportunity to clear dirt from the rim of the drum
Step 3 -
Place the new skin onto the beater side of the bass drum. Before you put the bass drum ring back on, apply a substantial amount of pressure onto the skin to ensure that it embeds onto the head of the drum firmly.
Step 4 -
Re apply the bass drum rim and the lugs and then hand tighten each lug in opposites to ensure the head is ready for tuning. This process should be repeated for both the batter and resonant heads on the drum.
Overview"what this lesson is about"
How To Re-skin A Snare Drum
In this lesson we are going to have a close look on how to re-skin your snare drum. The snare drum is a key part to the sound of the drum kit.
Watch The Video

Let's get started!
Step 1 -
As evenly as possible, loosen each one of the lugs on the snare drum. It is important that you do this moving in opposites to ensure that the tension is spread evenly over the head of the drum.
Step 2 -
Remove the snare drum hoop and skin. Use this opportunity to polish the drum hoop and wipe the head of the drum. This will ensure that the new drum skin sits properly onto the head of the drum.
Step 3 -
If you are removing the resonant head of the snare drum then you should make sure that the snares are removed first. You will need a drum key or a screwdriver depending on the build of the drum. Once you have loosened the braces on the side of the drum, remove the snare and store in a safe place until the head has been replaced.
Step 4 -
Now place the new skin onto the head and apply slight pressure onto the new skin. Do not be alarmed if you hear a cracking sound. This is normal as the skin settles onto the head of the drum.
Step 5 -
Now manually tighten each one of the lugs in opposites using your fingers until they are as tight as possible. This will make sure that the tension of the head is even and will make the tuning process easier. This process should be repeated for both the batter and resonant heads of the snare drum.
Overview"what this lesson is about"
How To Re-skin A Tom Drum
In this lesson we are going to have a close look on how to re-skin your snare drum. The toms are key in making your drum kit sound more melodic.
Watch The Video

Let's get started!
Step 1 -
As evenly as possible, loosen the lugs on the drum in opposites.
Step 2 -
Remove the drum hoop and old drum skin. Use this opportunity to polish the hoop and clean the drum head of any dirt that could effect the tuning process.
Step 3 -
Place the new skin on the head and apply slight pressure onto the middle of the drum to allow the skin to settle onto the head of the drum. Do not be alarmed if you hear a slight cracking sound, this is normal.
Step 4 -
Now place the drum hoop onto the drum and finger tighten all lugs moving in opposites until there is too much resistance. Once this is complete your drum is ready for tuning. This process should be repeated on the batter and resonant head for all of your tom drums.