Bass Lesson One - Understanding Tab

Understanding Tab
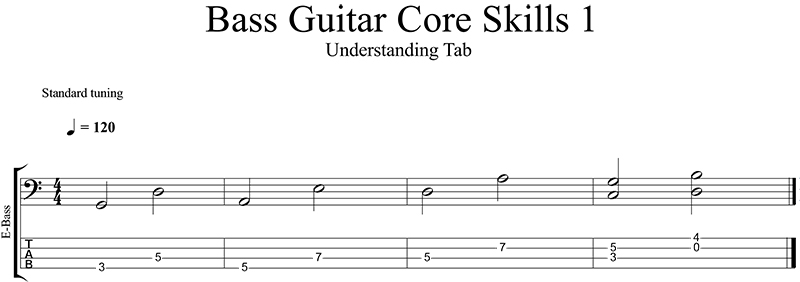
Diagram 1 is a piece of guitar tablature (tab). The lines running across represent the strings on the guitar, the thinnest string at the top, and the thickest at the bottom.
If you were to look straight down at a right handed fret board laid flat this is how it would appear.
The numbers that appear on the string let you know which fret to press. So for example if there is a 3 you place your finger on the third fret. You then follow the notes in sequence from left to right. If one or more notes appear at the same vertical point they are played together at the same time.
Diagram 1
Easy Tab

Standard Tab

Exercise
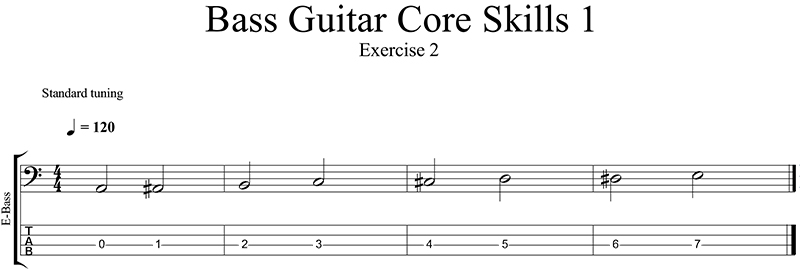
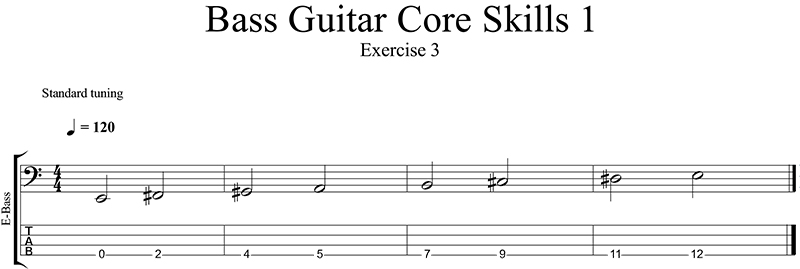
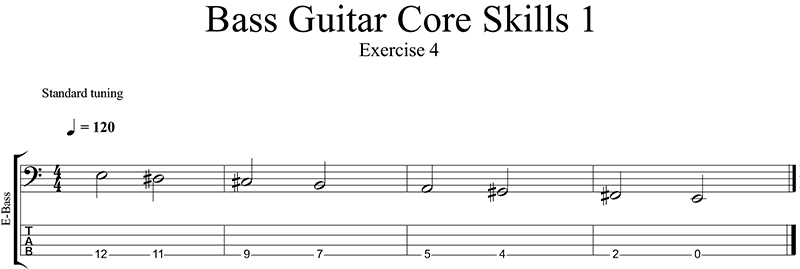
Attempt to pick out the notes that are being displayed on the tab. These exercises are primarily to help you get used to understanding tab. You may find it easier to use only one finger when fretting the notes. Plucking and fretting technique is covered in later lessons.
Things to think about:
• The correct string is being plucked
• The correct fret is being pressed
• Notes are being played in the correct order
Exercise 1
Easy Tab

Standard Tab

Exercise 2
Easy Tab

Standard Tab

Exercise 3
Easy Tab

Standard Tab

Exercise 4
Easy Tab

Standard Tab

What Next?
Keep on practicing this week’s exercises, getting used to understanding tab. If you would like an extra challenge, you could try the bass line played in Diagram 1. In next week’s lesson we will be looking at the technique used with the plucking hand.
